Facebook (Meta) isn’t just for baby photos and political rants. It’s a highly effective client-generating tool for lawyers in 2025.
With over 2.9 billion monthly active users and $36.5 billion in annual ad spend, businesses see its value.
On the other hand, traditional legal ads can be a money pit. For instance, TV spots can cost up to $8,000/month, radio up to $5,000/week, and billboards as much as $10,000/month, with no guarantee of leads.
Facebook ads, however, cost about $1 to $3 per click. And when done right, they could deliver a 300% to 500 % ROI — thanks to precise targeting and retargeting options.
Let’s break down the true ROI of Facebook ads for lawyers and the top 13 Facebook marketing moves that attract high-paying legal clients.
Why Should Lawyers Use Facebook Advertising?
With over 2 hours and 24 minutes spent daily on the platform, Facebook remains the most-used social media site. More than half of your potential client base is already scrolling on Facebook, making it one of the simplest ways to get in front of the right people.
Sure, Facebook isn’t Google when it comes to search power, but don’t underestimate its local SEO capabilities. When people look for nearby legal help, Facebook often shows your firm front and center, especially if you’ve optimized your page correctly!
Even better? Facebook’s built-in analytics give you real-time data so you can tweak campaigns on the fly — no wasted ad spend. It’s user-friendly, builds trust, boosts visibility, and with its precise targeting, Facebook ads for lawyers are both affordable and effective.
Stay ahead of the curve — don’t let your competitors out-market you. Check out our expert tips for law firm advertising.
By the Numbers: Is Facebook Advertising Really Worth It for Attorneys?
You’re a lawyer trying to get your name out there. Is Facebook the right place to advertise?
Absolutely! With 79% of Americans on Facebook, odds are your ideal clients are already scrolling. And with the platform’s broad reach and detailed targeting, it’s one of the few places where legal ads can get seen and clicked.
Now let’s talk money. Legal ads on Facebook typically cost $1 to $3 per click. Sounds small, right? But think about this: one click could land a client worth thousands. Suddenly, that $3 investment feels like a bargain.
Of course, Facebook isn’t magic — it’s strategy. Your ad needs to be laser-targeted and scroll-stopping. And your landing page? It needs to deliver on the promise, or your visitors will bounce, and you’re just burning through your budget.
If your message is strong and your targeting is smart, Facebook marketing is worthwhile for attorneys.
13 Best Facebook Marketing And Advertising Strategies for Lawyers
Like all things done well, successful Facebook ads for lawyers follow specific strategies to leverage the budget and reach new clients.
1. Set up a Facebook Business Page for Your Law Firm
Setting up a Facebook Business Page for your law firm is a crucial step in harnessing the power of Facebook marketing for lawyers to save money and solve problems for lawyers. Here’s how to set up your Facebook Business Page effectively:
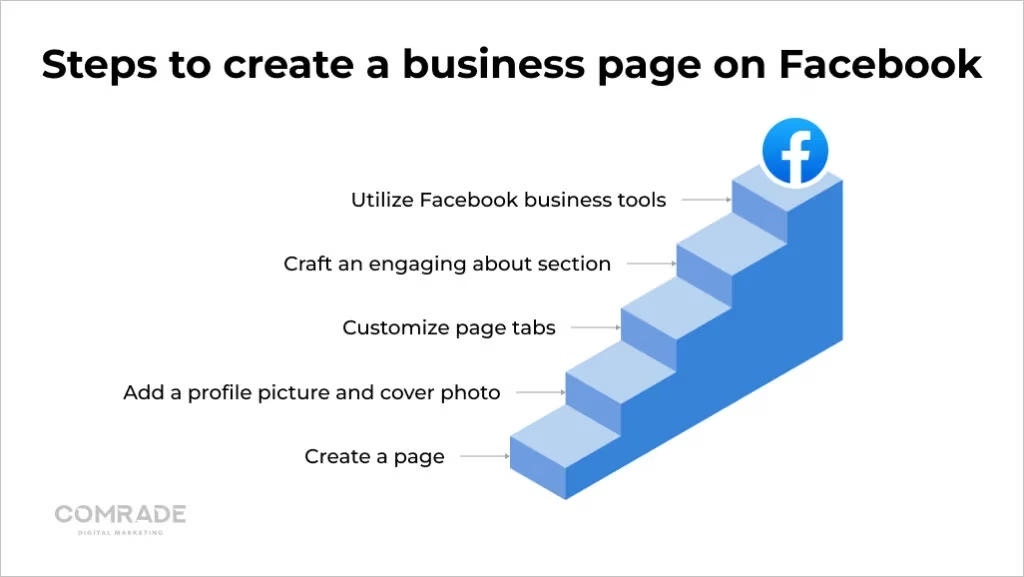
- Create a page: Visit Facebook’s business page creation portal and select the “Business or Brand” option. Choose the category that best represents your law firm and provide the necessary information, such as your firm’s name, address, contact details, and website.
- Add a profile picture and cover photo: Choose a professional-looking profile picture, such as your firm’s logo or a high-quality photo of the team.
- Customize page tabs: Customize the tabs on your Facebook Business Page to align with your law firm’s needs. Include tabs for services, reviews, events, videos, and any other relevant content to provide a comprehensive overview of your firm’s offerings.
- Craft an engaging “About” section: Write a compelling and informative description of your law firm in the “About” section. Make sure to incorporate relevant keywords to improve search visibility.
- Utilize Facebook business tools: Facebook offers a range of business tools to optimize your page’s performance. Take advantage of features like Insights to monitor engagement, schedule posts in advance, and utilize the Call-to-Action button to direct potential clients to your website or contact information.
By setting up a Facebook Business Page for your law firm, you can tap into a vast audience, engage with potential clients, and establish your online presence. This cost-effective marketing strategy allows lawyers to target specific demographics, share valuable content, and build credibility, ultimately saving money by reaching a wider audience and generating leads organically.
2. Create a Facebook Advertising Budget
Creating a Facebook advertising budget is a crucial step for lawyers looking to maximize the effectiveness of their marketing efforts while saving money.
Start by determining your overall marketing goals and objectives. Consider factors such as the target audience, geographical location, and specific legal services you want to promote.
Next, allocate a portion of your overall marketing budget specifically for Facebook advertising. Set a reasonable monthly or quarterly budget that aligns with your firm’s financial resources.
Achieving a strong Facebook ads ROI requires ongoing testing of formats, targeting, and bidding tactics. Monitoring ad performance regularly allows you to fine-tune your campaigns for better results and lower costs. With strategic planning, lawyers can use Facebook advertising to connect with their target audience, build trust, and drive meaningful engagement while maintaining cost control.
3. Get Hyper Specific About Your Ideal Client
With over 4.6 billion internet users worldwide, trying to reach everyone is a waste of money. That’s where Facebook’s laser-sharp targeting comes in.
You can target your ads based on age, location, job title, interests, behaviors, life events, and even the pages someone has liked. This level of precision is a game-changer for law firms.
Examples of Target Audiences for Lawyers:
- Personal Injury Lawyers
Target adults aged 25–65 who recently visited auto body repair shops, searched for chiropractor services, or follow pages related to car insurance, personal injury, or accident recovery. - Family Law Attorneys
Target recently separated individuals aged 30–55, living within 25 miles of your office, who have shown interest in divorce-related pages or support groups. - Criminal Defense Lawyers
Reach adults aged 21–50 who’ve searched for legal help, bail info, or follow pages on criminal justice, legal rights, or local court updates. - Estate Planning Attorneys
Focus on homeowners over 45, with interests in retirement planning, financial services, or elder care. - Business Lawyers
Target startup founders, small business owners, or people who follow pages like SCORE, Shark Tank, or QuickBooks.
Compared to traditional ads in newspapers or on the radio, Facebook gives you control over who sees your ad, when, and why — so you’re not wasting money on the wrong audience.
4. Create an Effective Facebook Ad Campaign
Americans see between 4,000 and 10,000 ads a day — so if your law firm’s Facebook ad looks like everyone else’s, it’ll get ignored.
Here’s how to make your Facebook ad campaign stand out and actually drive results:
A. Lead With a Hook That Grabs Attention
You’ve got 2–3 seconds to stop someone from scrolling. Use bold headlines, emotional triggers, or pressing legal questions like:
- “Injured in a crash? Don’t speak to insurance until you read this.”
- “Divorcing? Here’s what most attorneys won’t tell you.”
B. Match Your Brand Tone to Your Audience
Your ad should reflect your firm’s personality and appeal to the clients you want:
- Personal Injury Firms might use urgent, empathetic messaging and testimonials.
- Criminal Defense Lawyers might lean into calm, confident, reassuring tones.
- Family Law Firms may choose a warm, supportive tone with family-oriented visuals.
- Some brands may even use tasteful humor (where appropriate) to stand out.
C. Use Multiple Content Formats
A single image won’t cut it. Mix and match content types to find what resonates:
- Short videos explaining legal tips
- Carousel ads showing client success stories
- Infographics breaking down a process (e.g., “How a PI claim works in 3 steps”)
- Facebook lead forms for direct inquiries
D. Define What Makes You Different
Saying you “fight hard for clients” isn’t unique — it’s expected. Instead, highlight what sets your firm apart:
- “98% settlement rate without going to court”
- “Free case evaluations within 24 hours”
- “Board-certified in family law with 15+ years of experience”
Ask yourself: Why should someone choose your firm over another? That’s your unique selling proposition (USP) — make it clear in your ad.
E. Test & Tweak
Even a great ad can flop without testing. Run A/B tests on:
- Different headlines
- Ad creatives (image vs. video)
- Offers (free consultation vs. downloadable guide)
Once you see what works, scale up and optimize.
The most successful Facebook ad campaigns for lawyers combine clear messaging, strong visuals, and a firm understanding of the target audience.
Dominate search results by partnering with a law firm SEO marketing agency today.
5. Split Test Your Facebook Ads
Facebook defines A/B testing as an experiment that lets you “change variables, such as your ad copy, audience, or placement, to determine which strategy performs best and improve future campaigns.” It is a marketing strategy that tests two elements of a campaign against each other to showcase which delivers the best results.
Each A/B test result informs future decisions around your content and ad campaign, allowing you to make smart, incremental changes that garner more engagement. Ideally, A/B testing should be used continually to improve a given experience or single conversion goal over time, so all your Facebook ads can have a higher click-through rate.
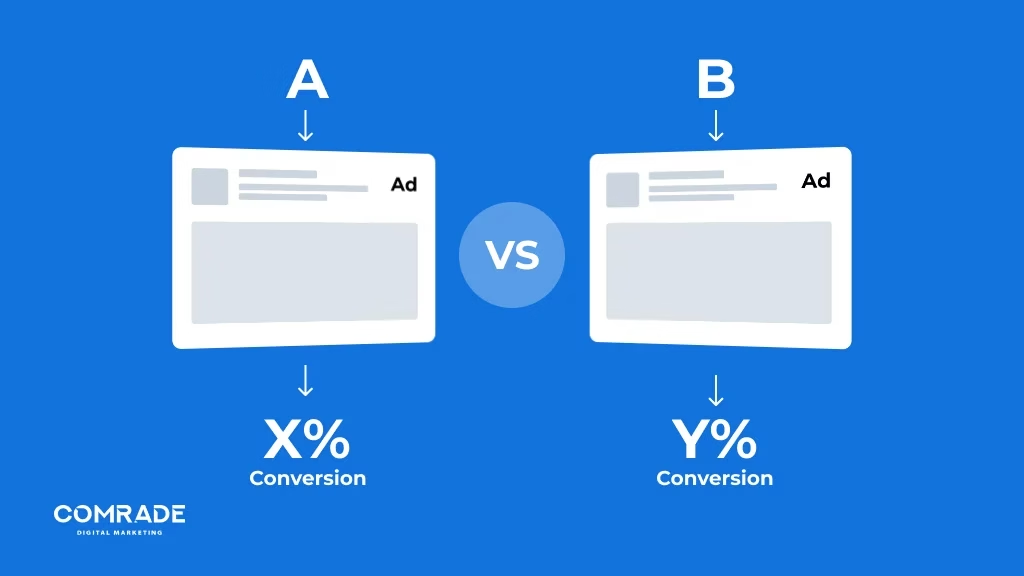
For example, you may want to test the graphics for a Facebook ad to understand which sells your services the best. A/B testing is an effective way to do this. Once you understand which images work best, you may decide to test the copy, and so on, until you have collected the data needed to create the ideal Facebook ad.
6. Leverage Retargeting Ads for Your Law Firm’s Facebook Page
Retargeting ads can be a game-changer for lawyers looking to maximize the effectiveness of their Facebook marketing efforts. By using retargeting ads on your law firm’s Facebook page, you can re-engage with potential clients who have already shown interest in your services. These attorney Facebook ads work by targeting users who have previously visited your website, engaged with your Facebook page, or interacted with your content. This allows you to stay top of mind and increase the likelihood of conversion.
To leverage retargeting ads effectively, start by installing a Facebook pixel on your website. This pixel tracks user activity and enables you to create custom audiences based on specific actions taken on your site. You can then create targeted ad campaigns that specifically reach those who have shown an interest in your law firm. By tailoring your messaging and promotions to these individuals, you can deliver personalized content that resonates with their needs, increasing the chances of conversion.
Retargeting ads not only help you save money by focusing your advertising efforts on warm leads but also provide a more efficient way to reach potential clients who are more likely to engage with your law firm.
7. Use All Available Media
From image to video, ad polls, stories, and direct messenger ads, there are so many ways to get your law firm in front of prospective clients. Because law firms don’t sell physical products, content marketing in the form of blogging and video often performs well on Facebook.
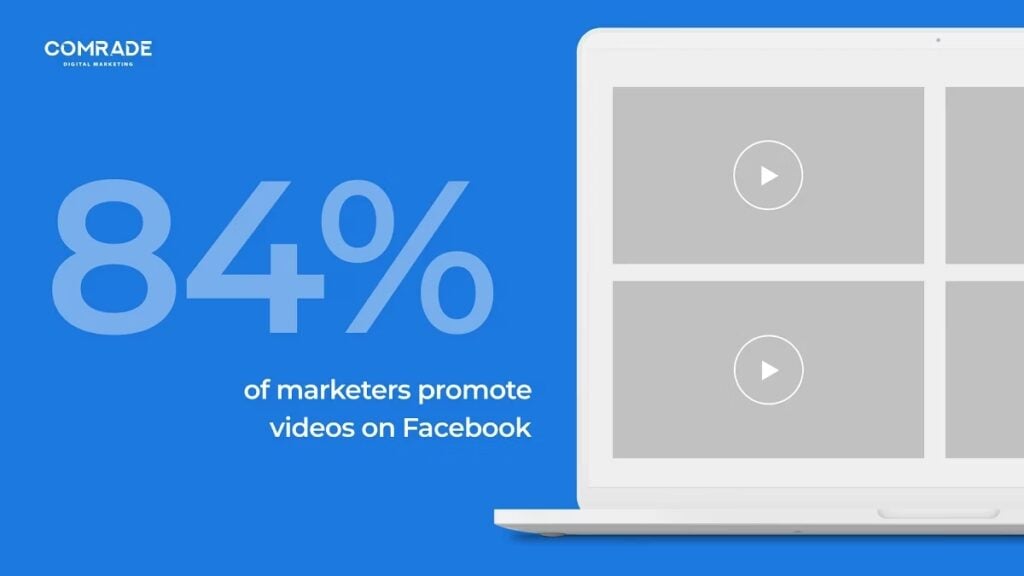
In fact, 84% of marketers use video on Facebook. What’s more, if you’re trying to generate leads, video is a more reliable option. According to Databox, in a recent survey, 74% of people reported that videos were more effective for generating leads. Why? Mainly because they grab attention, raise awareness, are memorable, and are easy to consume. This doesn’t mean you should abandon other content marketing strategies altogether – just prioritize the ones with a higher ROI!
8. Optimize for Mobile
70% of people’s digital time in the U.S. is spent on mobile phones. Any company that does not optimize its marketing strategy will fall behind. One of the advantages of a law firm’s Facebook page is that it allows you to create Facebook ads that are seamlessly integrated into its mobile app. Facebook’s mobile Promoted Post ads form part of Facebook users’ newsfeeds, so they often don’t realize they are viewing an ad.
Furthermore, for brick-and-mortar businesses, location-based marketing can also bring in new lawyer leads. Local SEO, the practice of optimizing a company’s search engine rank to appear when a prospective client is within the vicinity, also improves online visibility and foot traffic. For example, most law firms only want certain Facebook mobile ads to appear when users are within a 2-mile radius of their firm.
Looking for inspiration on the best mobile law firm websites? Explore our top picks today.
9. Add CTA’s to Your Law Firm Facebook Ads
It seems obvious, but all marketing content needs a call to action (CTA), including Facebook ads. This is a marketing term designed to elicit an immediate response or sale. Traditionally, and still widely used, are phrases like “call now,” for example.
CTAs act as signposts that let prospective clients know what to do next. Without a clear, compelling call to sign up for a newsletter or purchase a product, your lead may leave your current website without accomplishing what your marketing tactic intended them to do.
Facebook advertising truly understands the value of CTAs and lets advertisers add call-to-action buttons to lawyer ads based on specific business goals. They have a list that you can choose from, allowing users to take different actions based on your campaign objective. Strategic calls-to-action increase leads and directly impact your law website’s conversion rates.
Let Comrade Digital Marketing Agency improve your Facebook marketing strategy. Schedule a free consultation.
10. Advertise the Right Pages
Landing pages are essential because they give each of your offers a place to live, making it easier to funnel visitors effectively. For example, if you specialize in family law, you might create a landing page that offers a free eBook on how to file for divorce and another one on how the court awards child custody.
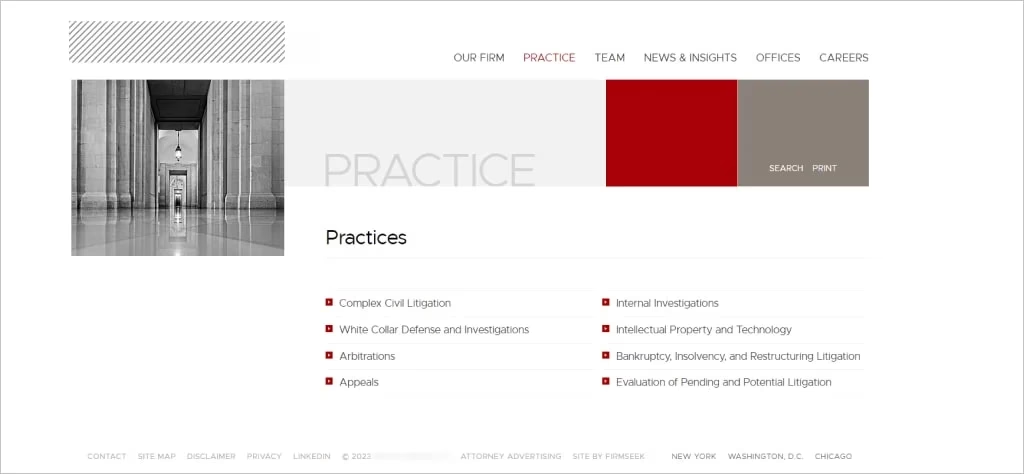
Having separate landing pages allows you to divide these prospective clients into different parts of the buyer’s journey and makes them more likely to go through with the next offer because it relates to what they’re seeking. When you present an offer on Facebook, it will send the user to a targeted landing page to capture the lead. Advertising the appropriate landing page ensures the user is nudged correctly along the marketing funnel.
11. Use All the Available Tools for Facebook Ads
It’s much easier to make a Facebook ad with Facebook’s Ad Manager. With this user-friendly feature, you can create ad campaigns, manage multiple lawyer ads simultaneously, and assess how well they perform. You can design your ads in a step-by-step process and see how well they measure up by reviewing granular data.
The Ads Manager app for both iOS and Android lets you monitor your law firm’s Facebook campaigns on the go. You can create and edit ads, track their performance, and manage budgets and scheduling, no matter where you are. All you need to do is set up a Facebook Business Manager account. To accomplish that, you need a Facebook business page.
12. Pay Attention to Facebook Insights and Analytics
Analyzing Facebook Insights and Analytics is a crucial step in maximizing the effectiveness of law firm Facebook marketing and saving money in the process. By paying attention to these metrics, lawyers can gain valuable insights into the performance of their Facebook advertising campaigns.
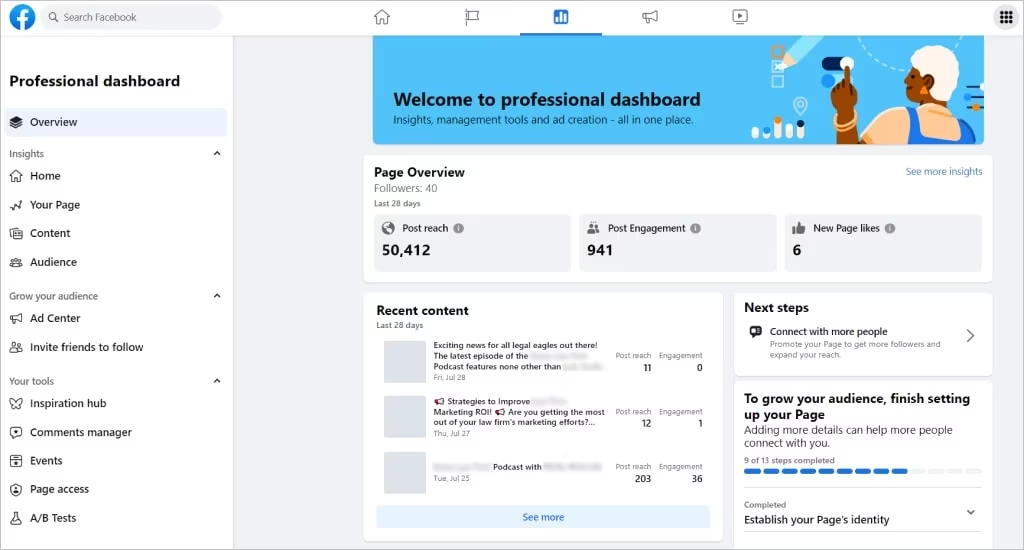
Understanding metrics such as reach, engagement, click-through rates, and conversion rates allows lawyers to evaluate the success of their strategies and make data-driven decisions for optimization.
By identifying which lawyer ads are performing well and resonating with their target audience, lawyers can allocate their budget more efficiently, focusing on the most effective campaigns and eliminating underperforming ones.
This approach helps lawyers improve marketing ROI by maximizing the return on their Facebook advertising efforts, leading to valuable results for their law firm.
13. Run a Multi-Channel Facebook Campaign (Ads + Organic Content)
Many law firms don’t rely on either ads or organic posts — they use both, together, in one strategic flow.
This is called a multi-channel campaign, and here’s how to pull it off on Facebook:
A. Promote a Core Offer with Facebook Ads
Use paid ads to promote something specific and valuable. This could be:
- A free consultation for accident victims
- A divorce planning checklist
- An estate planning webinar
Target your ideal client (see Tip #3), and include a strong call-to-action like “Download Now” or “Book Your Free Call.”
B. Back It Up with Organic Content
Now use your Facebook Business Page to reinforce the same message through regular posts:
- Post a video clip answering an FAQ related to your offer
- Share a client testimonial that relates to the service you’re advertising
- Create a carousel post summarizing what’s in your downloadable checklist
This makes your firm look active and trustworthy, so when someone sees your ad, visits your page, and sees recent relevant content, they’re more likely to convert.
C. Use Retargeting to Keep the Conversation Going
Not everyone converts the first time. Retarget ad viewers with content like:
- “Still thinking about filing for divorce? Here’s what to expect.”
- “Didn’t download your accident claim checklist? Grab it here.”
This keeps your firm top of mind and helps guide leads down the funnel over time.
D. Track Performance Across Both Channels
Use Facebook Insights to see which organic posts drive engagement and which ads lead to clicks or conversions. Then adjust your messaging accordingly. The goal is to create a campaign that feels seamless.

Get More Clients from Facebook Ads — Delivered to You Automatically!
Facebook marketing for attorneys is a powerful client acquisition channel… when done right.
Don’t risk your money on poorly-built ads and bad tracking.
At Comrade Digital Marketing, we’ve helped firms like Lehmbecker Law achieve a 645% marketing ROI, and others like Barr & Douds Law boost qualified leads by 937% — all through smart, data-driven PPC and SEO strategies.
Plus, you’re never in the dark! With our AI-powered Growth Portal, you’ll get 100% real-time transparency into your leads and what’s driving revenue.
Lastly, you’ll keep full ownership of your content, data, and campaigns — always.
Book a Free Strategy Audit today and start getting high-paying cases consistently.
📞 Call us at (872) 242-1074
